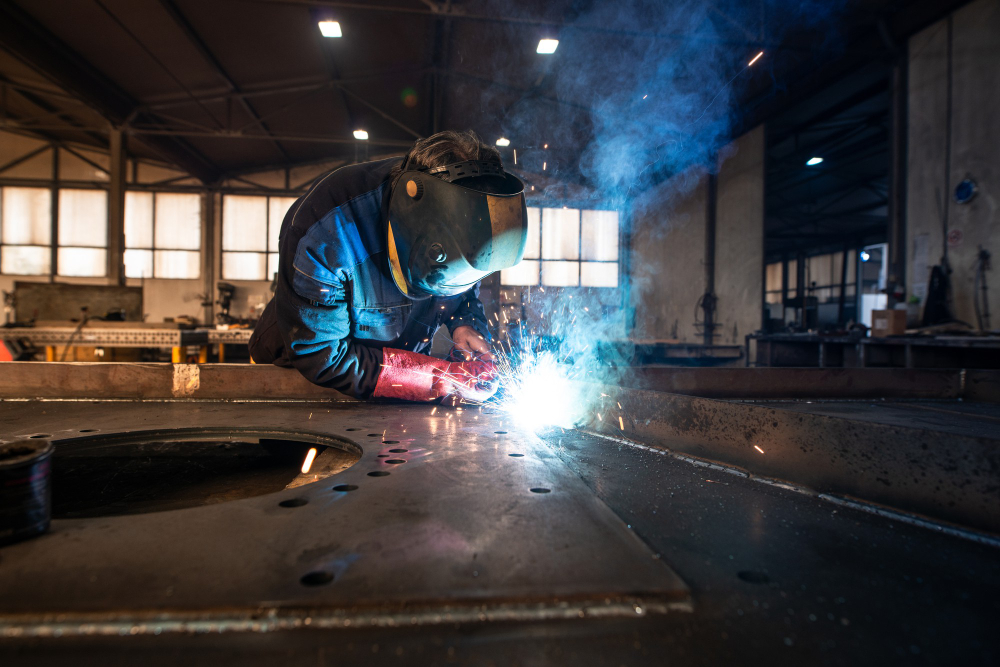
In this blog post, we will explore how to make a metal melting furnace. This is a great project for those who want to learn how to melt metal at home. We will go over the materials needed and the steps involved in making your furnace. With this furnace, you will be able to melt metals such as aluminium, brass, and even copper.
Welding Guide
Melt Metal at home How to Make a Metal Melting Furnace
Published: 2024-01-31
Need Metal Welding Work?
Get a free quote from our expert welders
How to melt metals at home
If you're interested in melting metals at home, there are a few things you'll need to get started. First, you'll need a metal melting furnace. You can purchase one online or at a local hardware store. Once you have your furnace, set it up in a well-ventilated area and follow the manufacturer's instructions for safety.
Next, gather your scrap metal pieces and sort them by type. Heavier metals will take longer to melt, so if you're working with multiple types of metal, it's best to start with the lighter ones. Once your furnace is heated up, slowly add your scrap metal to the melting pot. Use tongs to avoid getting burned.
As the metal melts, it will produce fumes that can be harmful to your health if inhaled. Be sure to work in a well-ventilated area and wear a respirator mask if possible. Once all of your scrap metal has melted, you can pour it into moulds to create new objects or pour it into an ingot mould to store for later use.
What you will need
To melt metal at home, you will need a few key items:
-A furnace: this can be either electric or gas-powered. If you're going the electric route, make sure you have access to plenty of power outlets; if you're using gas, make sure you have the appropriate type of fuel on hand.
-An oven-safe container: this will be where you melt the metal. It needs to be big enough to accommodate the amount of metal you want to melt, and it should be made of a material that can withstand high temperatures (such as ceramic or refractory).
-Metal: obviously, you'll need some metal to melt! The type of metal will dictate what kind of furnace you need; for example, an aluminium melting point is lower than an iron melting point, so an aluminium furnace wouldn't need to be quite as hot as an iron furnace.
-Safety gear: when dealing with molten metal, it's important to take precautions against burns. Make sure you have gloves, eye protection, and long sleeves/pants before getting started.
Making the furnace
If you're interested in melting metal at home, you'll need to build or purchase a metal melting furnace. These furnaces come in a variety of shapes and sizes, but they all have one thing in common: they need to be able to withstand high temperatures.
When choosing a furnace, you'll need to consider the following:
- The type of fuel you'll be using. Coal and coke are common choices, but you can also use natural gas, propane, or electricity.
- The size of the furnace. This will depend on the amount of metal you want to melt
- The shape of the furnace. There are two main types: cupola furnaces and reverberatory furnaces. Cupola furnaces are more efficient but require more maintenance, while reverberatory furnaces are cheaper to build but not as efficient
- The refractory lining. This is what protects the furnace from high temperatures. Common materials include fire brick, alumina oxide, or silicon carbide.
Once you've chosen a furnace, you'll need to build it or have it built for you. The process is relatively simple:
1) excavate a hole in the ground that's large enough to accommodate your furnace; 2) line the hole with refractory material; 3) build the shell of the furnace out of fire brick or steel; 4) install doors and vents; 5) insulate the interior of the furnace; 6
Melting metal
Metal melting is a process that involves heating a metal to its melting point and then keeping it at that temperature until it liquefies. The most common method for melting metals is through the use of an electric furnace, but other methods can be used, such as induction furnaces or resistance furnaces.
The first step in melting metal is to choose the right type of furnace for the job. Electric furnaces are the most commonly used type of furnace for home metal melting because they are relatively inexpensive and easy to operate. However, induction furnaces or resistance furnaces can also be used for melting metals.
Once you have chosen the right type of furnace, the next step is to determine the correct temperature for melting the metal. The melting point of a metal is the temperature at which it changes from a solid to a liquid state. This information can be found in tables that list the properties of various metals.
After you have determined the correct temperature for melting the metal, you will need to heat the metal in the furnace until it reache's this temperature. Once the metal has reached its melting point, you will need to keep it at this temperature until it liquefies. This process can take several minutes or hours, depending on the size and quantity of metal being melted.
Once the metal has liquefied, you can then pour it into moulds or onto surfaces to create shapes or objects. Metal that has been melted can also be cast into
Materials for Melting Aluminum Cans
There are a few different materials that you will need to melt aluminium cans at home. The most important material is an electric furnace. This type of furnace can be purchased at most hardware stores. You will also need a crucible, which is a container that is used to hold the molten metal. Crucibles are made from a variety of materials, but silicon carbide is the best type to use for melting aluminium cans. Finally, you will need some sort of heat source. A propane torch or an electric resistance heater will work perfectly for this purpose.
Melting the Aluminum
The aluminium will melt at a temperature between 1,221 and 1,232 degrees Fahrenheit. To get the metal to this temperature, you'll need to use a furnace. The best way to do this is to build your melting furnace. This can be done by taking an old steel can and lining it with fire bricks. Then, you'll need to create a hole in the bottom of the can for the Burner Tube. Next, you'll need to add insulation around the outside of the can. Finally, you'll need to put the lid on the can and drill a hole in it for the thermometer.
Now that you have your melting furnace built, it's time to start melting some aluminium! First, you'll need to find some scrap aluminium. Once you have your scrap aluminium, you'll need to clean it off and cut it into small pieces. Small pieces of aluminium will melt faster than large pieces. Now that your aluminium is cut up into small pieces, it's time to start melting!
Place your aluminium pieces into the furnace and turn on the burner. It's important to keep an eye on the thermometer so that you don't overheat the metal. If the metal gets too hot, it can burn and create dangerous fumes. Once the metal has melted, you can use a ladle or crucible to pour it into moulds or another container.
Congratulations! You've now melted aluminium at home!
Forge Your Steel at Home
If you're interested in working with metal, there's no need to spend big bucks on a commercial furnace. You can easily build your metal melting furnace at home using readily available materials.
The most important thing to consider when building a metal melting furnace is the type of fuel you'll use. The two most common types of fuel for home furnaces are propane and charcoal. Propane is the more expensive option but it burns hotter and is easier to control. Charcoal is less expensive but can be tricky to work with.
Once you've decided on your fuel, you'll need to gather the rest of your materials. For the body of the furnace, a good option is a steel drum. You'll also need some refractory bricks to line the inside of the furnace, and insulation material to help keep the heat in.
Building the furnace itself is relatively simple. Start by cutting a hole in the top of the steel drum for your crucible (the container you'll pour the molten metal into). Then line the inside of the drum with refractory bricks, leaving an opening at the bottom for airflow. Add insulation around the bricks, then place your crucible inside and secure it in place.
To get started melting metal, light your fuel and allow it to burn for a while before adding any metal to the crucible. This will help preheat the furnace so that your metal will melt more quickly. Once everything is up to the temperature
Home Foundry - Metal Casting At Home
A home foundry is a great way to get into metal casting. If you're interested in making your metal objects, or even just recycling scrap metal, a home foundry can be a great investment.
There are a few different ways to set up a home foundry, but the most common is to use an electric furnace. These furnaces are available in many different sizes, so you can choose one that's right for your needs.
The first step in setting up your home foundry is to gather all of the necessary supplies. You'll need some refractory bricks to line the inside of your furnace, and some insulation to keep the heat in. You'll also need some sort of crucible to hold your metal while it melts, and some tongs or other tools to help you pour the molten metal.
Once you have all of your supplies, you're ready to start building your furnace. The first step is to build a firebox out of refractory bricks. This is where you'll put your fuel (usually charcoal) and get it burning hot enough to melt metal.
Once your firebox is built, you can start working on the rest of the furnace. The next step is to build a chimney out of bricks or pipe. This will allow the hot air and gases from the firebox to escape, and will also help draw fresh air into the firebox.
Once your chimney is built, you can
Metal Casting Is Easier Than You Think
If you have ever wanted to melt metal at home, but thought it would be too difficult or expensive, think again! Metal casting is actually quite easy, and with a few simple supplies, you can be up and running in no time.
All you need to get started is a metal melting furnace. These can be found at most hardware stores or online retailers. Once you have your furnace, simply set it up according to the manufacturer's instructions. Then, gather your metal scraps and place them in the furnace.
Turn on the furnace and wait for the metal to melt. Once it is melted, you can use a variety of tools to shape it into whatever form you desire. Finally, let the metal cool and solidify before removing it from the furnace.
With just a little practice, anyone can become a master metalsmith! So why not give it a try today?

Need Metal Welding Work?
Our expert welders are ready to help with your project. Call us now for a free quote.
Call Us NowConclusion
Making a metal melting furnace at home is a fun and easy project that anyone can do. With a few simple supplies, you can build your furnace and be melting metals in no time. This guide walks you through the entire process, from building the furnace to choosing the right metal to melt. So what are you waiting for? Get started on your metal melting furnace today!
Our Welding Services
Looking for professional welding work? Check out our full range of services.
Request a FREE Quote!
Or call us directly on 0426 416 748
More Welding Guides

4 Different Types of Welding Processes
The welding process is an important one in the manufacturing industry. It s a method used to join two or more pieces of metal together by using heat and pressure. The pressure is applied with an electrode, which is then connected to a power source. Welding is used in a variety of industries, including construction, automotive, aerospace, and more. It s a versatile process that can be used to create everything from small parts to large structures. There are four different types of welding process
Read Guide
4 Types of Steel: What Makes Them Different?
Steel is one of the most common materials used in manufacturing and construction. It s strong, durable, and versatile, which makes it ideal for a wide range of applications. But did you know that there are different types of steel? In this blog post, we ll be taking a look at four of the most common types of steel and what sets them apart. Carbon Steel Carbon steel is one of the most common and versatile types of steel. It s composed of iron and carbon, which gives it a wide range of properties
Read Guide
Different Sorts Of Steel Metals
If you re in the steel market, you might be overwhelmed by all of the available different types. How do you know which one is right for your project? In this blog post, we will explore the four most common types of steel and their key differences. From carbon steel to stainless steel and more, read on to learn about each type of steel and what sets it apart from the rest. There are dozens of types of steel, each with unique chemical and physical properties. In this article, we ll take a look at
Read Guide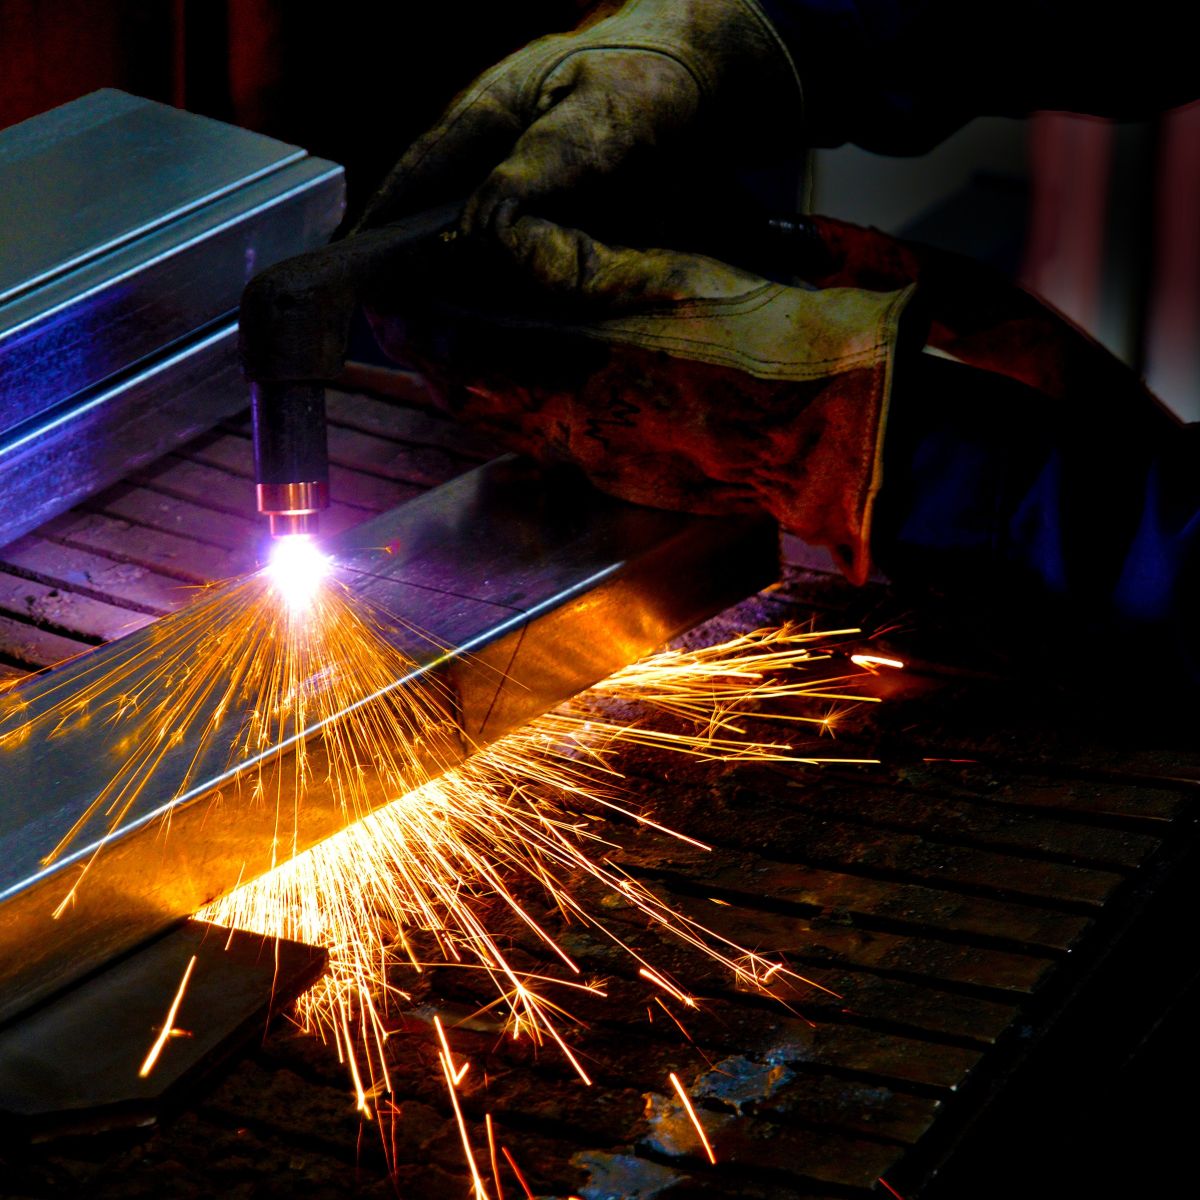
Which Metal Will Burn? Australian General Engineering
Which Metal Will Burn? Australian General Engineering Have you ever wondered which metal will burn? We all know that metal is a good conductor of heat, but did you know that some metals are more flammable than others? In this blog post, we ll take a look at the different flammability levels of various metals, so you can be informed the next time you re working with them. We ll also explore how to extinguish a metal fire, in case you ever find yourself in that situation. What is the Difference Be
Read GuideWhat things need to be considered for Welding Goggles ?
There are a lot of things that need to consider before purchasing welding goggles. In this blog post, we will discuss those things in detail so that you can make an informed decision. The first thing that you need to consider is the type of welding torch you will be using. There are two types of welding torche's available in the market gas and plasma. If you are using a gas welding torch, then you need to purchase gas welding goggles. On the other hand, if you are using a plasma welding torch, th
Read Guide
What's the Best Way to Cut Steel Wire Rope?
What is the process of Cut Steel Cable? Cutting steel cable is a process that requires the use of a specialized cutting tool. The most common type of cutting tool for this purpose is a rotary cutter, which uses a rotating blade to cut through the cable. There are also handheld cutting tools available that can be used to cut steel cables, but these are not as common. To cut steel cable with a rotary cutter, first make sure that the cutting tool is properly positioned and secured. Next, align the
Read Guide